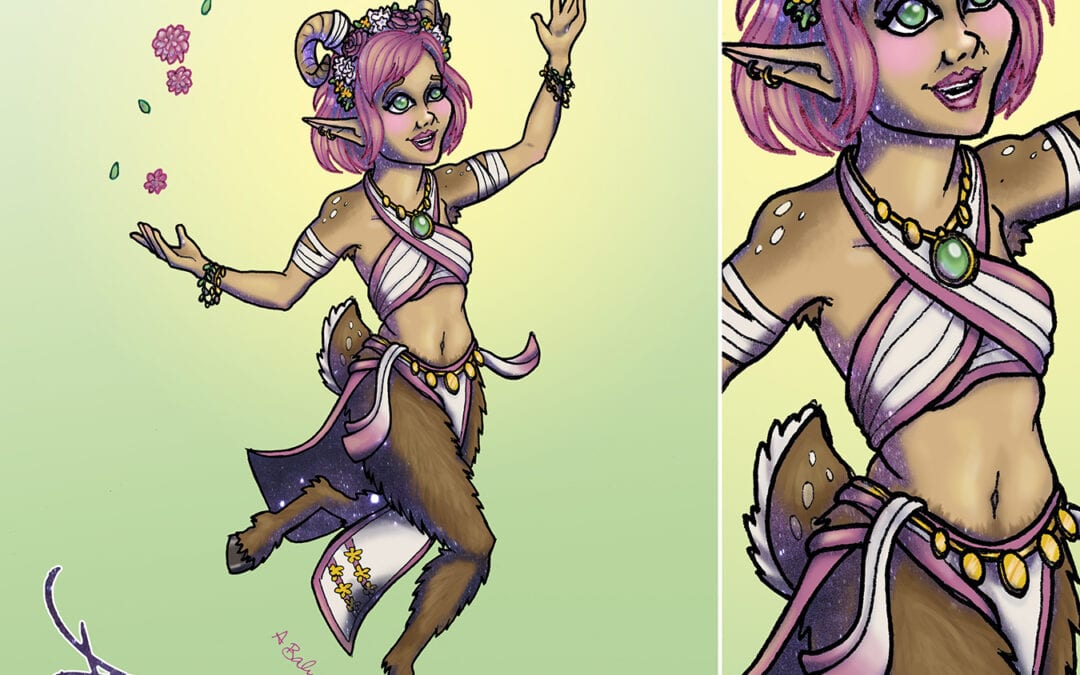
Want to know what I do when I start up a D&D Character Drawing? Here's the step-by-step of how I drew this picture of my Bard/Barbarian character Amaryllis aka "Sparkle Brute".
Sometimes I draw and colour entirely on paper, and sometimes I do it entirely digitally. And sometimes, as in this case, I do the drawing on paper, and colour digitally.
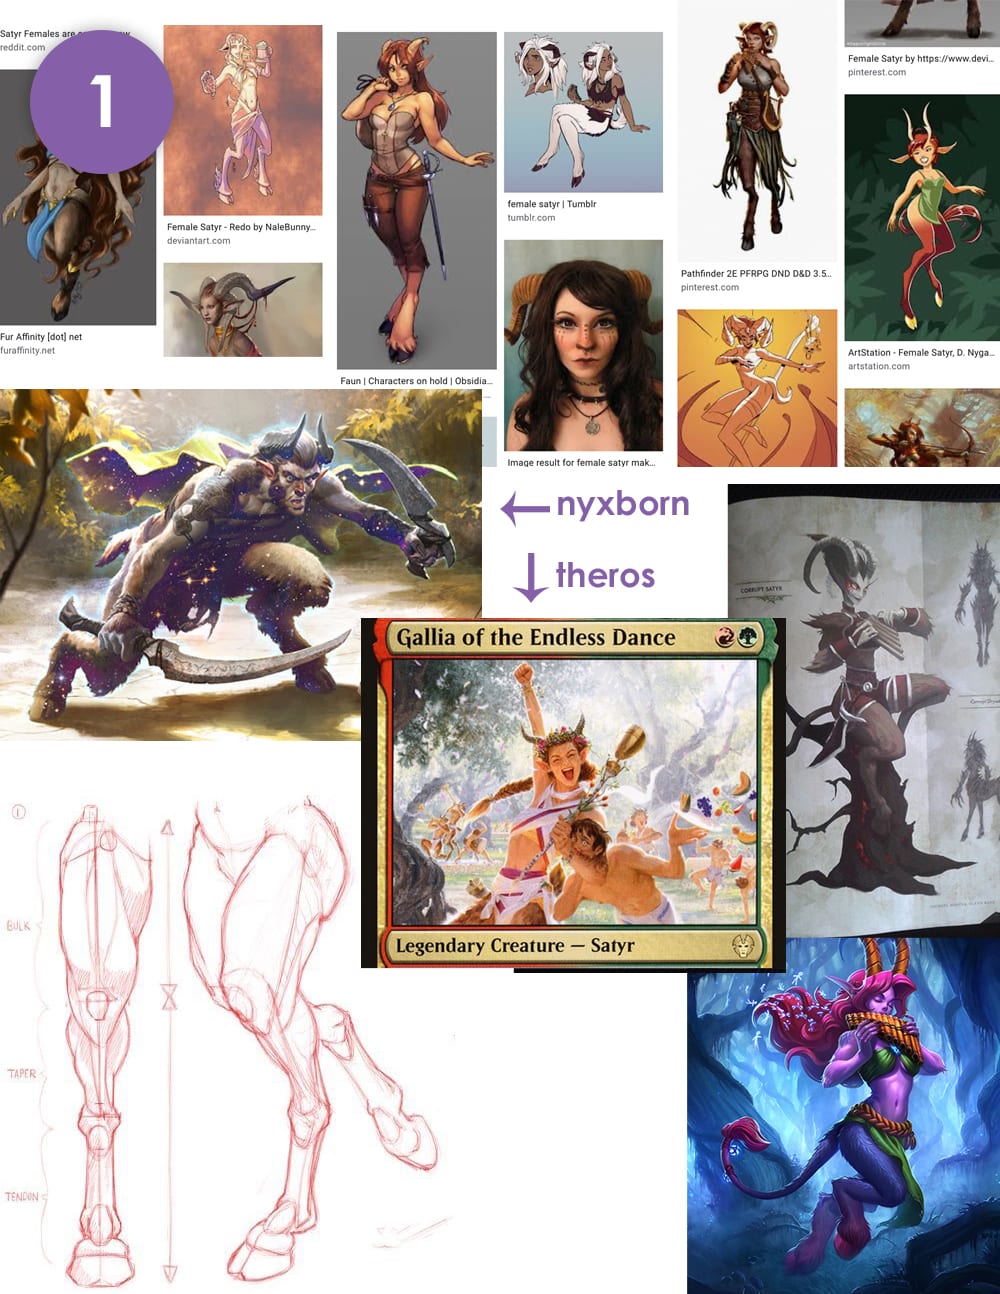
1. Research
Amaryllis is a nyxborn satyr from Theros, a plane from Magic: The Gathering based on ancient Greece. I did some research to find out how she should look. As a nyxborn, all the shadows on her person reflect the starry sky of Nyx. As a satyr, she’s half goat, so I looked up how their legs are different from human legs, and what is generally accepted as “this is a satyr.” And I checked to see if there was anything specific on appearance or fashion in regard to satyrs from Theros.
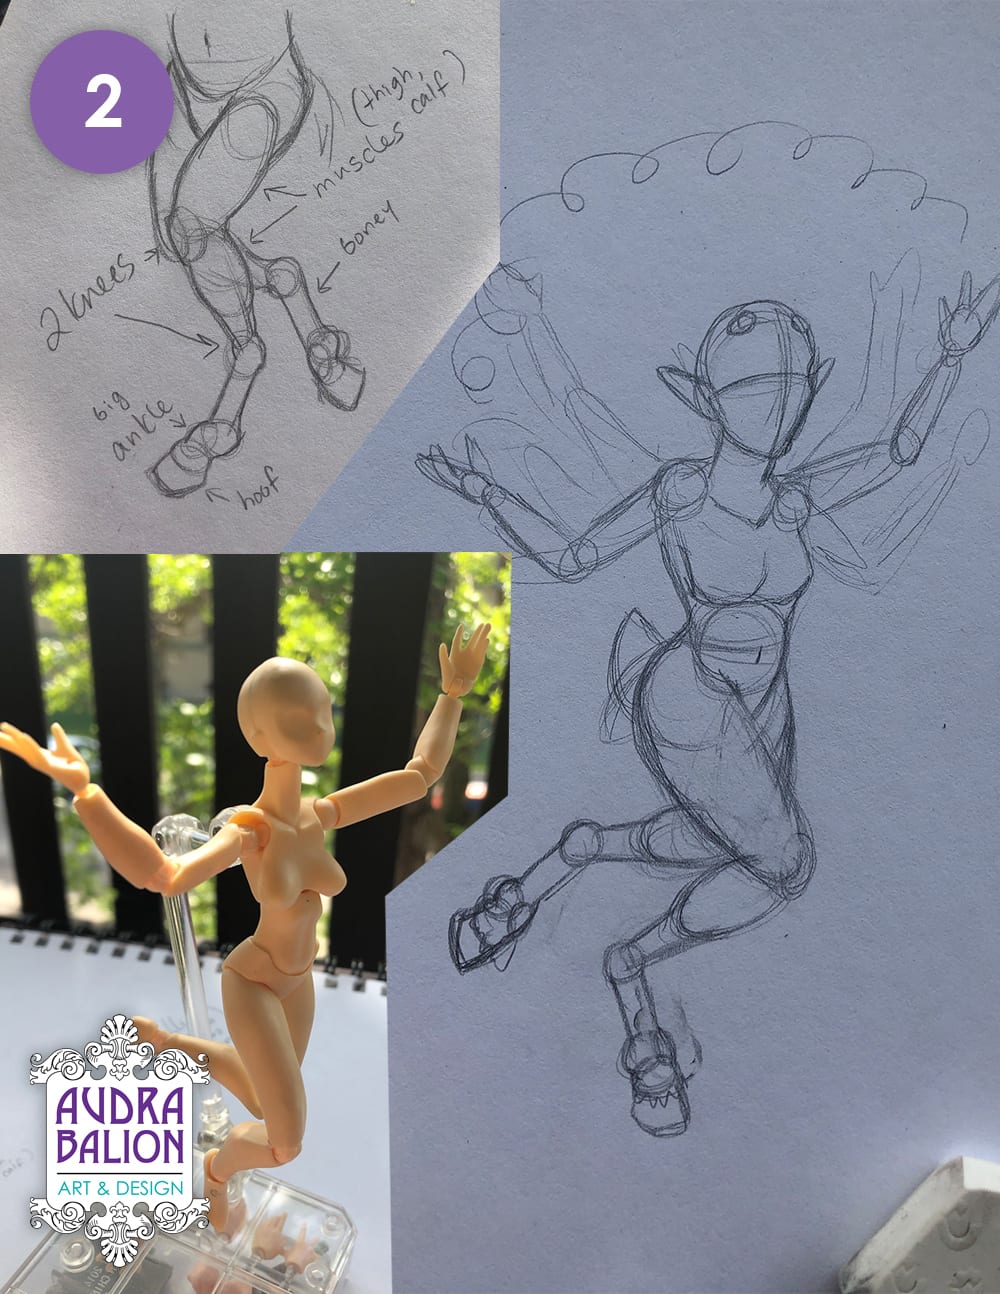
2. Practice
I don’t draw satyrs much, so I did a practice sketch to wrap my mind around the goatish legs first. Then I used my posable doll for a pose reference and did a sketch. I've talked a lot about the importance of practice and repetition and this was no exception!
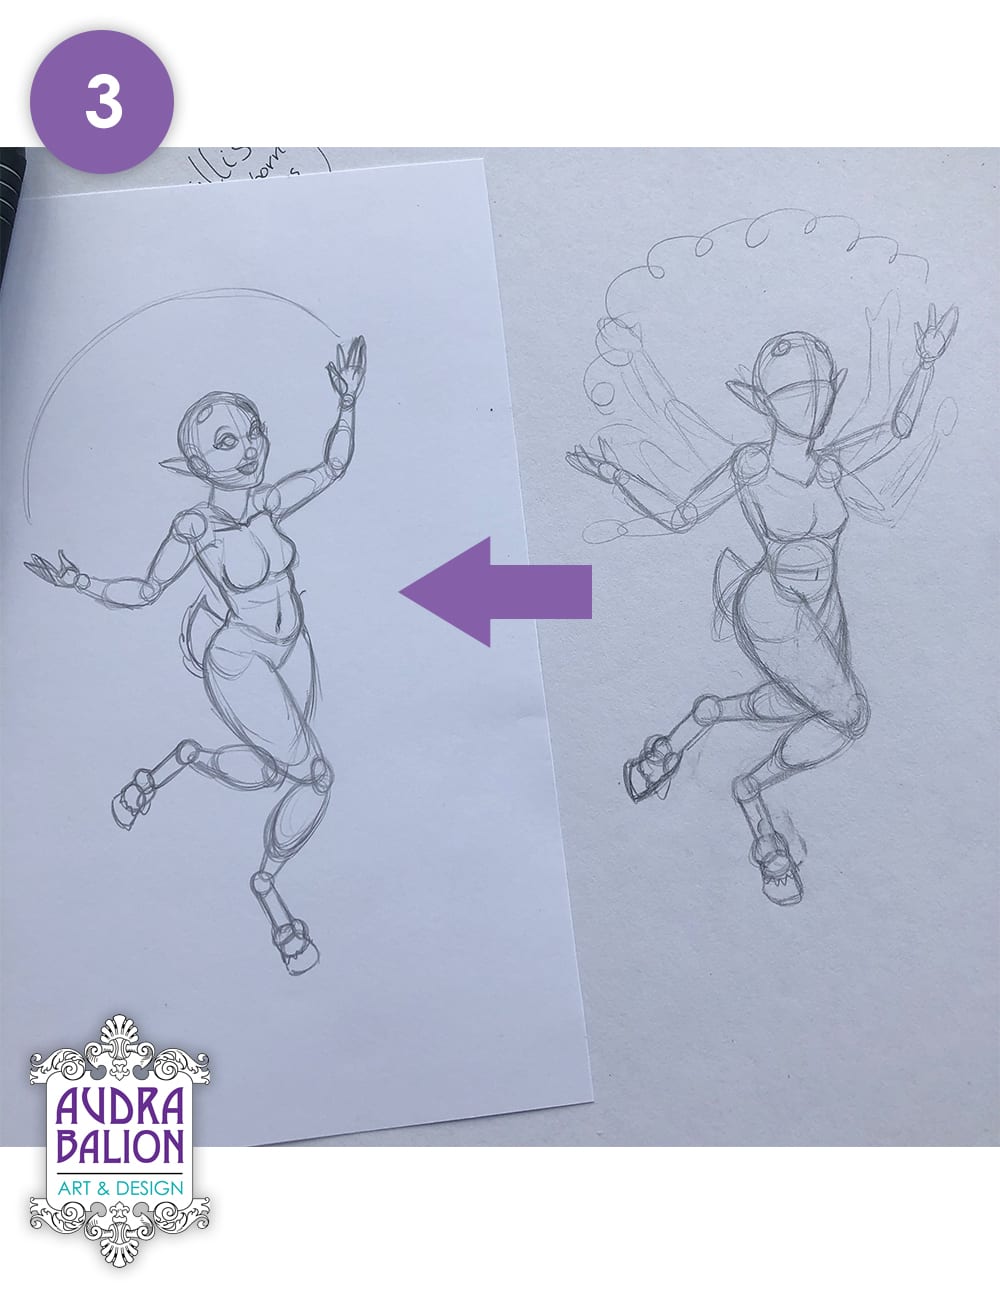
3. Redraw
I didn’t like the original sketch. I felt it was stiff and not quite right. I redrew it, giving the pose more of a curve and energy.
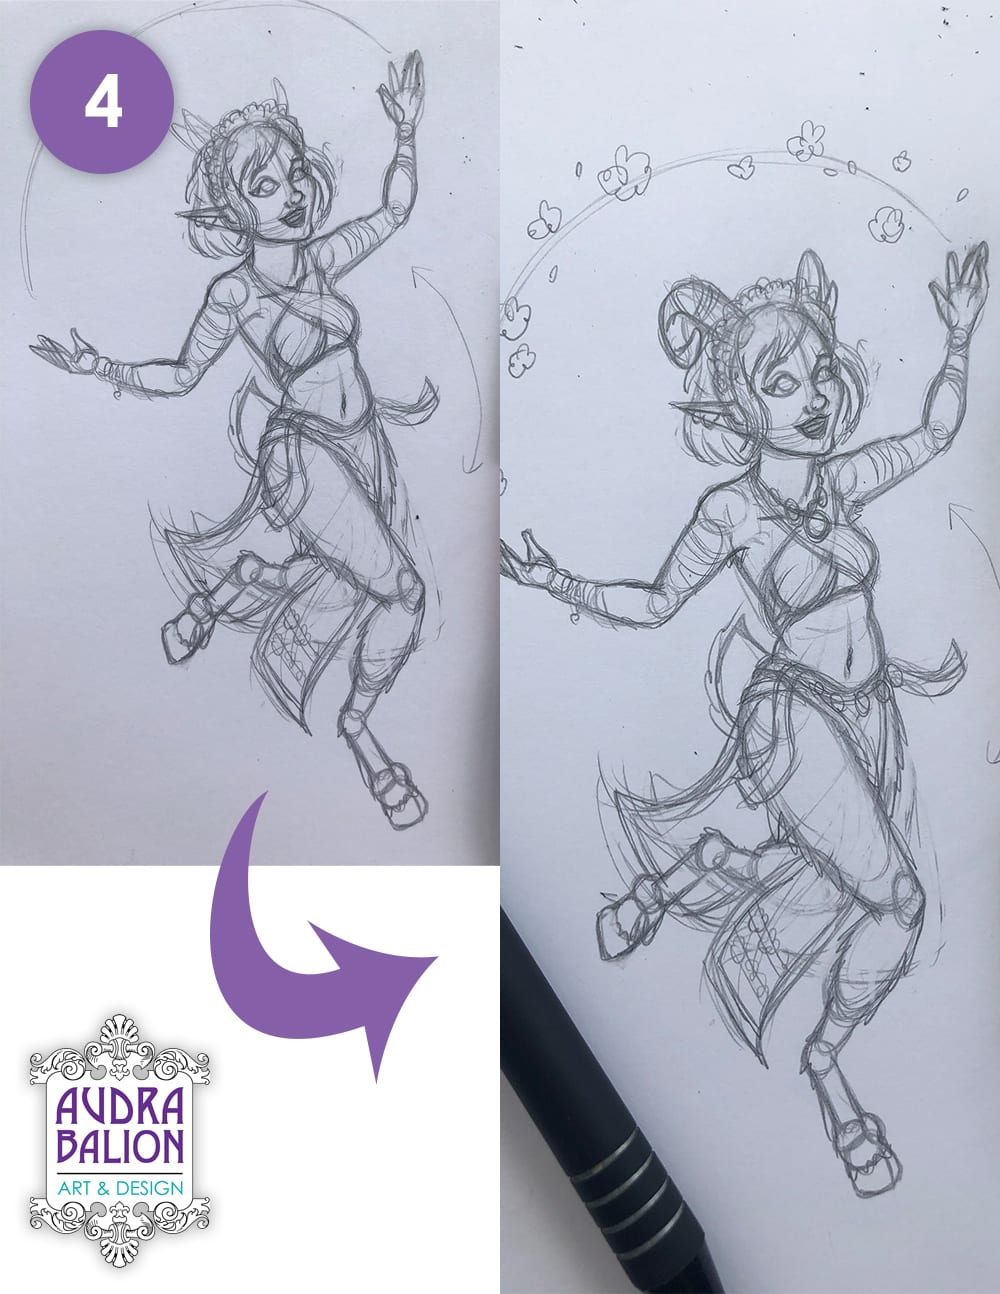
4. Details
Added clothing based on the Theros style (check out a great example with Gallia of the Endless Dance by Johannes Voss). Then I included more details with jewelry and flowers. Changed her horns from little points to cute curly ones. This character is very bubbly, and is obsessed with flowers, so I’m trying to reflect her personality in her design.
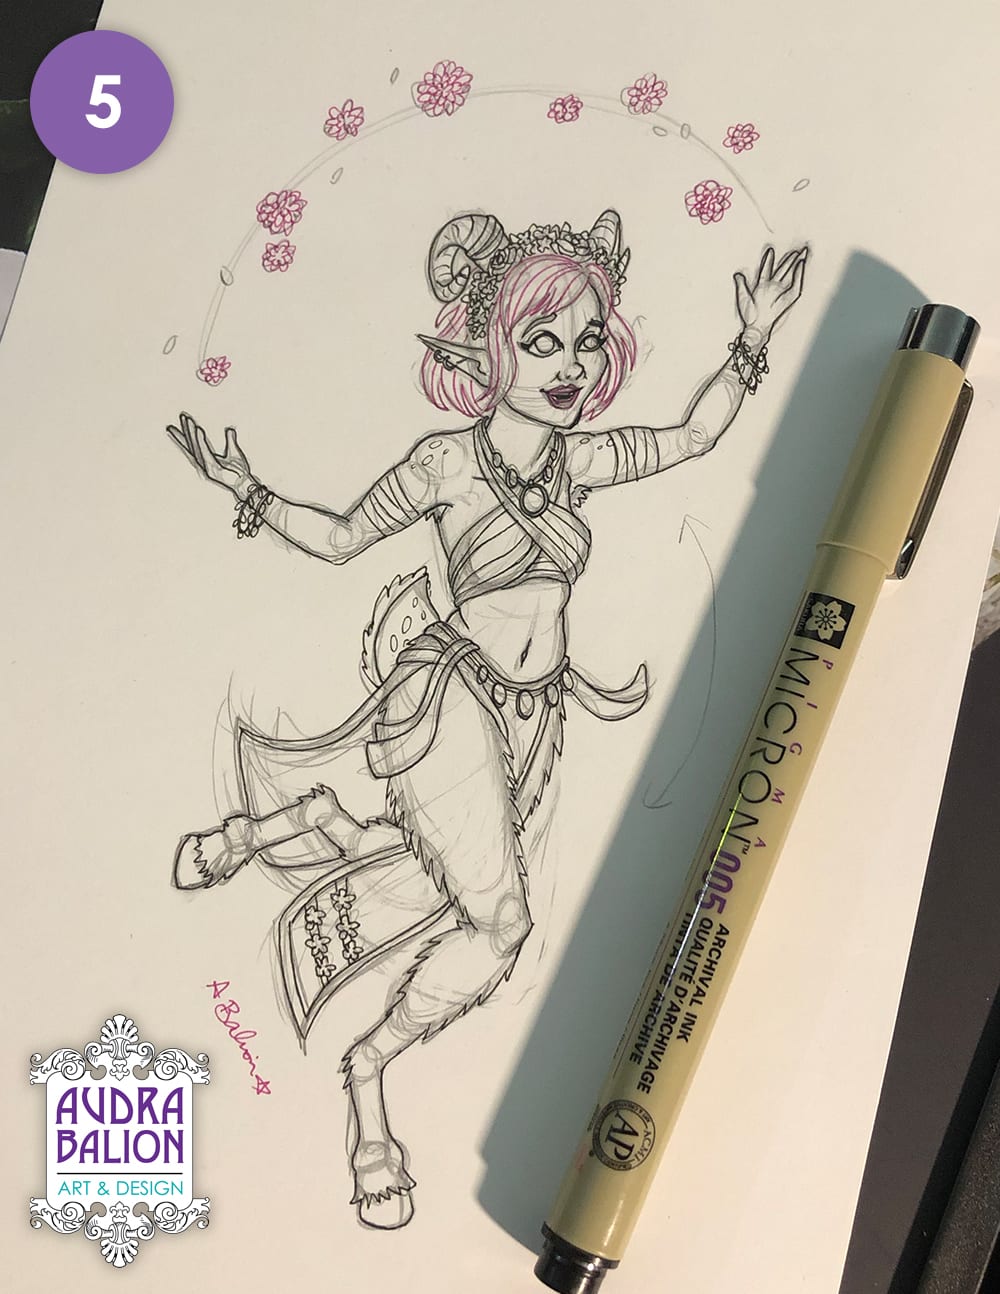
5. Basic Ink
Once I’m happy with the design, I do basic inks, using a 005 size pen.
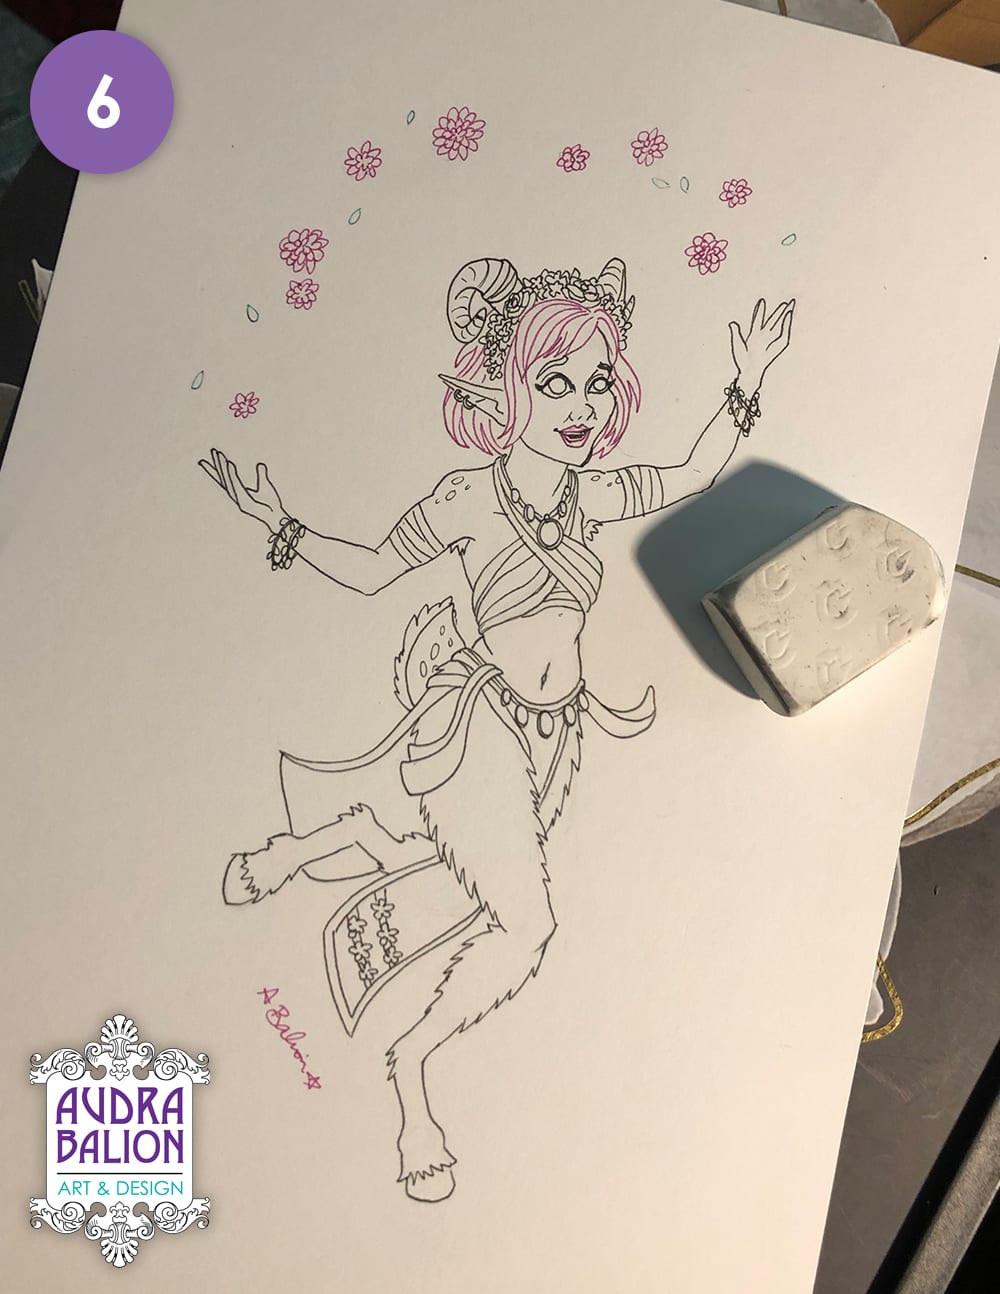
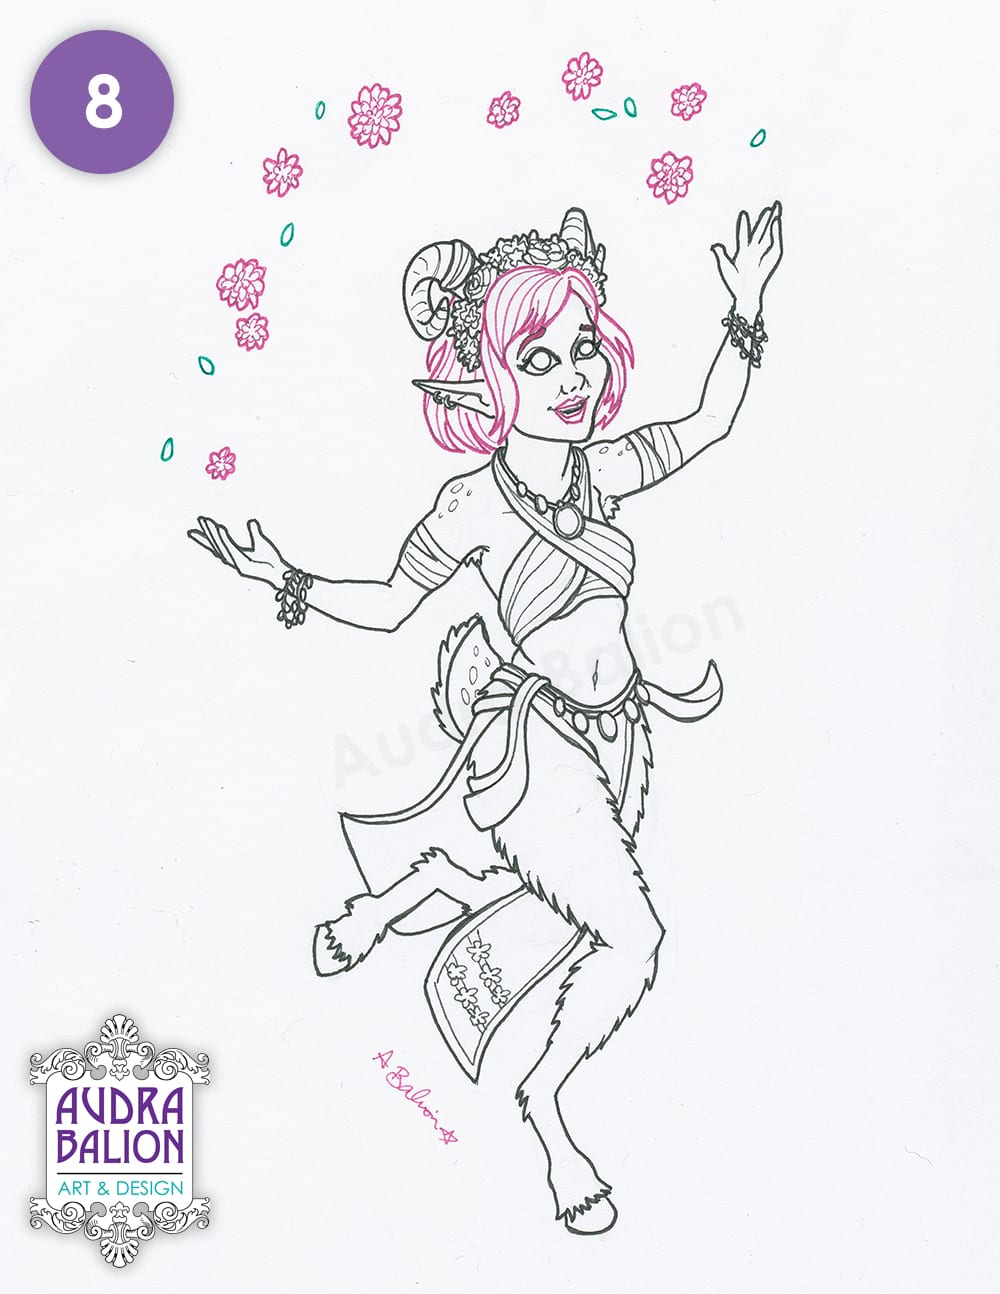
6. Erase
Erase the pencil!
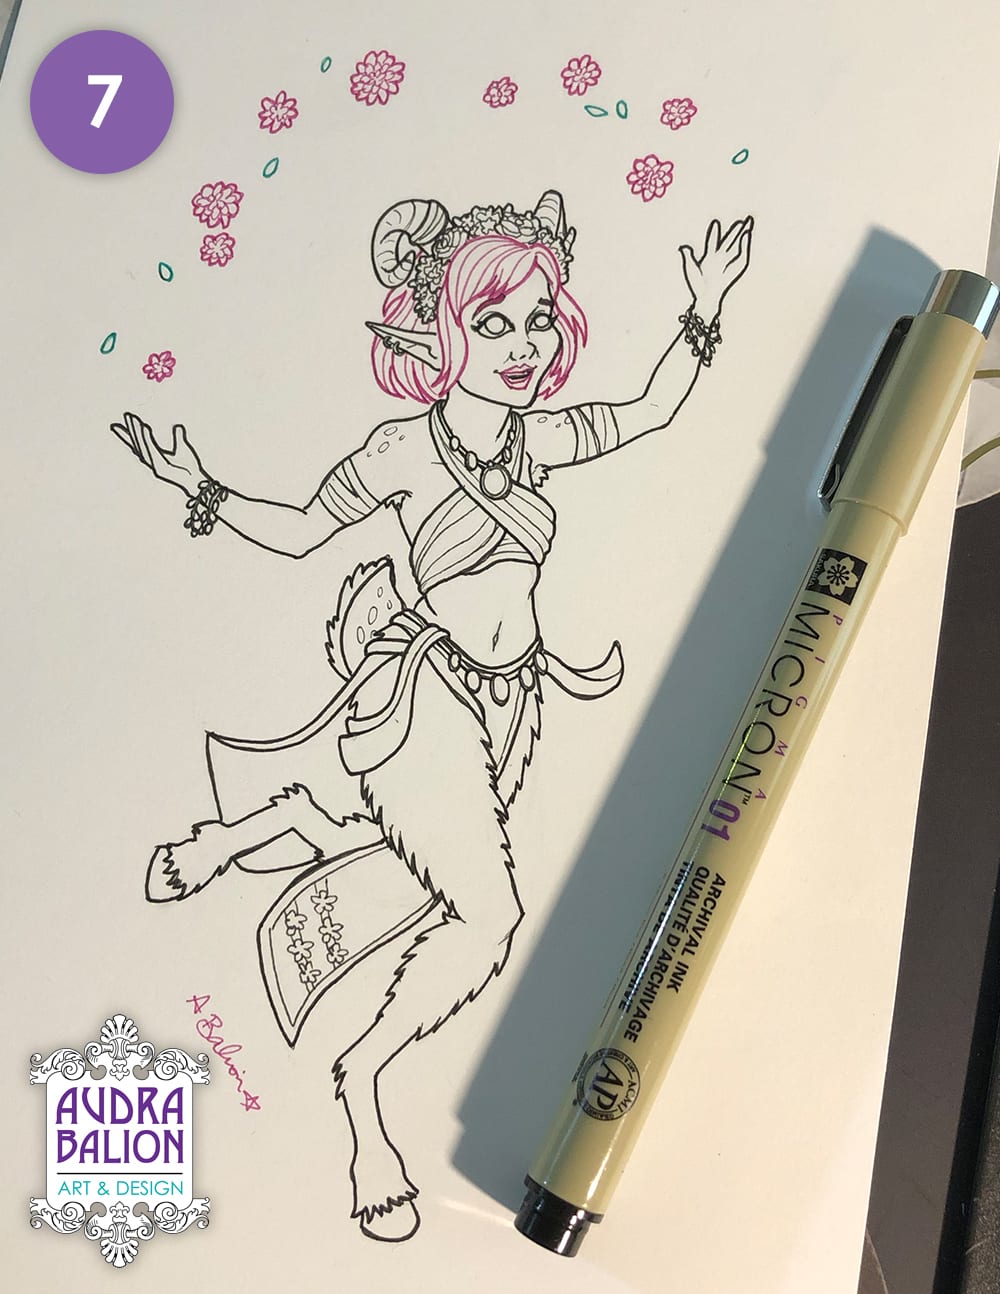
7. More Ink
I add more definition to the inks, using a thicker 01 size pen. Mostly, I focus on outlines of objects, leaving the smaller details alone. (For example, I outline the shape of the clothes with the thicker pen, but the folds and patterns remain 005.)
8. Scan, and Prep Lineart Layer
This is the point where I switched from traditional to digital for this particular D&D character drawing.
I scan the finished line art, and bring it into photoshop. At this point, I get rid of the white background, leaving only the lines. How to do that: In the top toolbar > Select > Color Range > Fuzziness at 200, Select: Sample Colour (Use Colour Dropper to select White) > Press Okay. You’ll see a marquee (dotted line) around the lineart. Press Delete, and it deletes the white. I will usually Duplicate & Merge this lineart layer to make the lines darker. The line art layer will go above all the other layers.
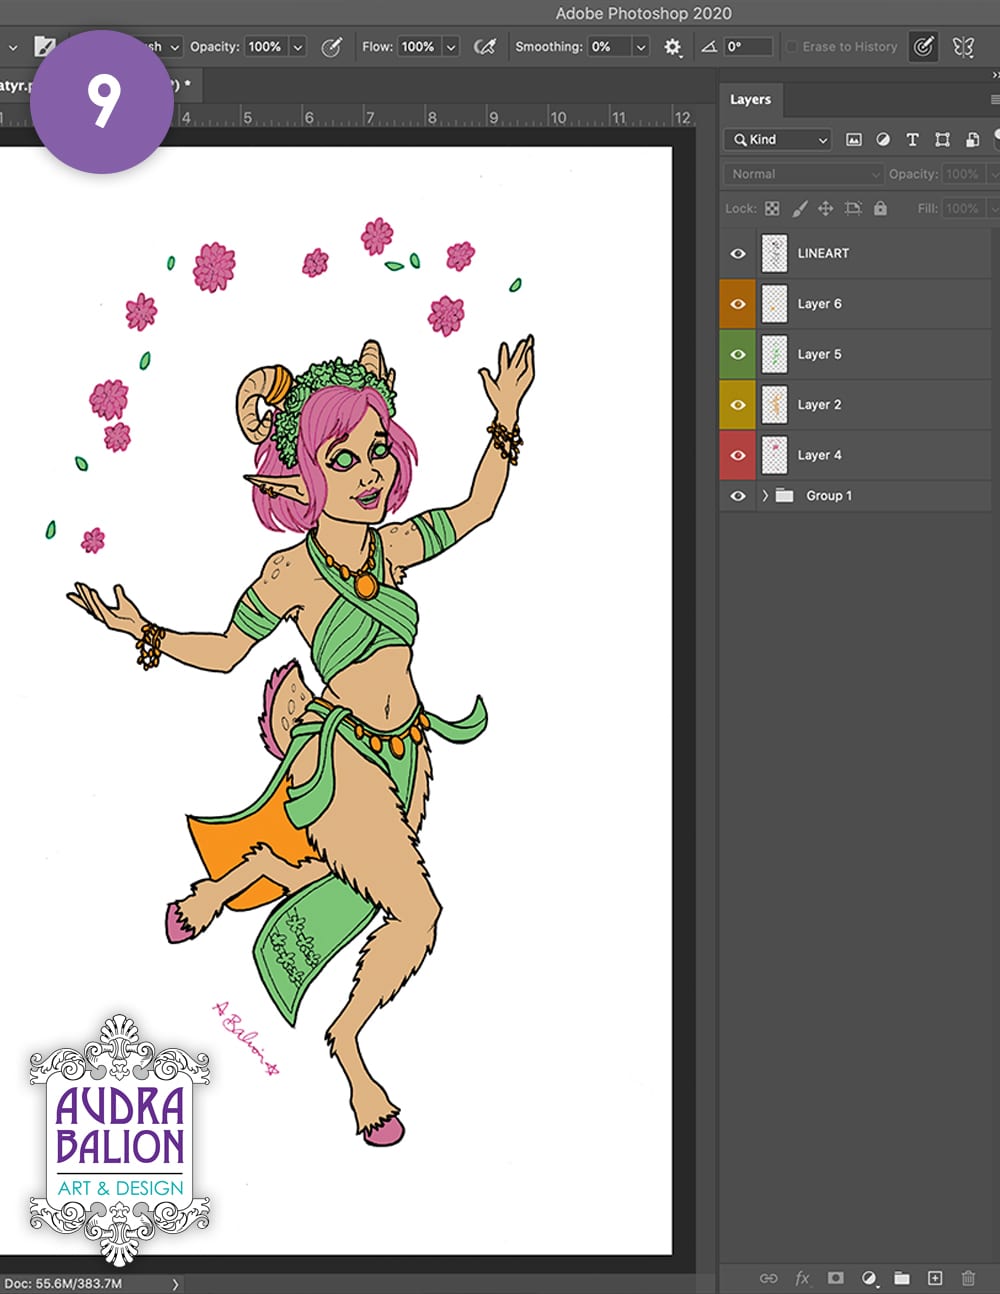
9. Divide Layers
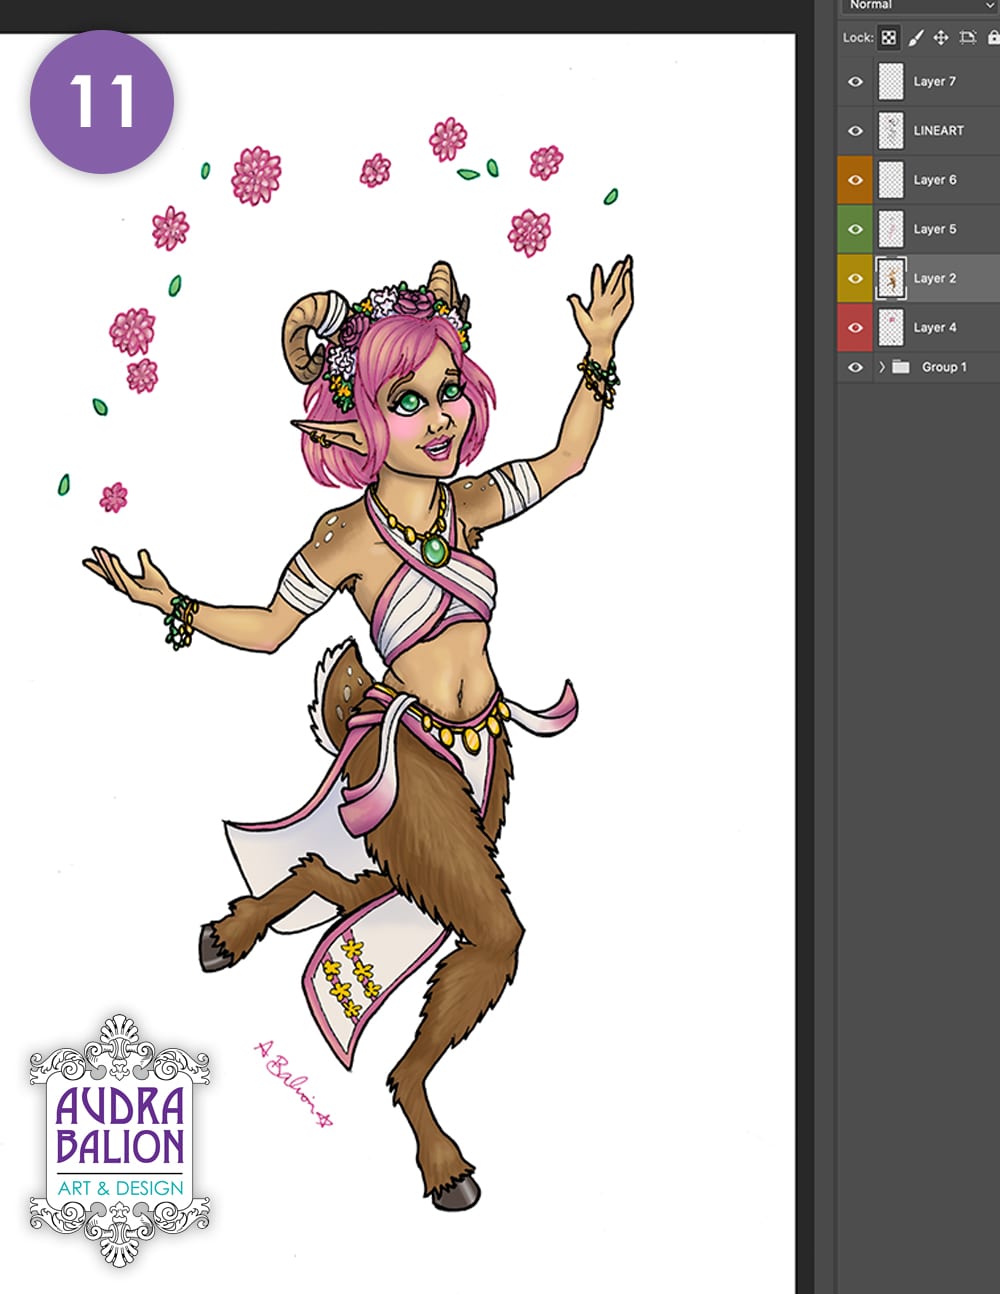
I work in layers when colouring on photoshop. This helps keep things clean, because you can work on one layer without messing with the others. I used four layers on this one, and when I first divide the layers, I just colour with random bright colours so I can see them easily. Things that are touching, and are different colours, should be on different layers. For example, see how the necklace is orange, the skin brown, and the shirt green. If the necklace was also on the green layer, I might mess with it while shading the shirt.
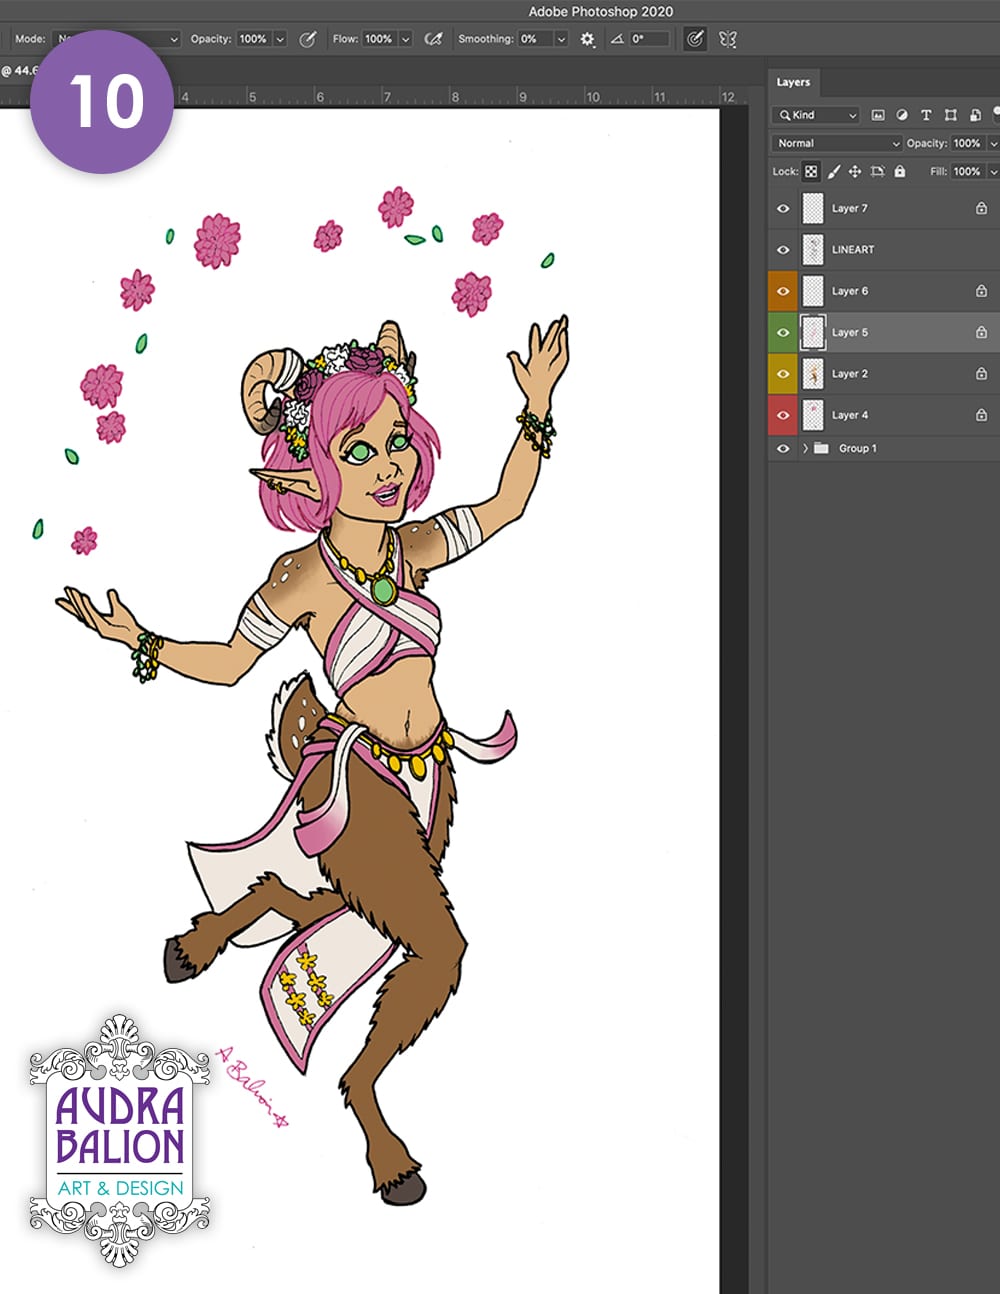
10. Base Colours
One everything is blocked in, Lock all the layers by selecting the layers and pressing that checkerboard looking button above the layers. The checkerboard represents the transparent pixels (ones without colour). When you lock them, you won’t be able to edit them. This means when you colour over things in this layer, you will only affect the pixel which you’ve already coloured. You’ll know a layer is locked because a little padlock appear on that layer. Now I correct the techno-colours to be the correct colours. I use a soft brush to add the brown to her shoulders, and the pink ombre on her belt thing.
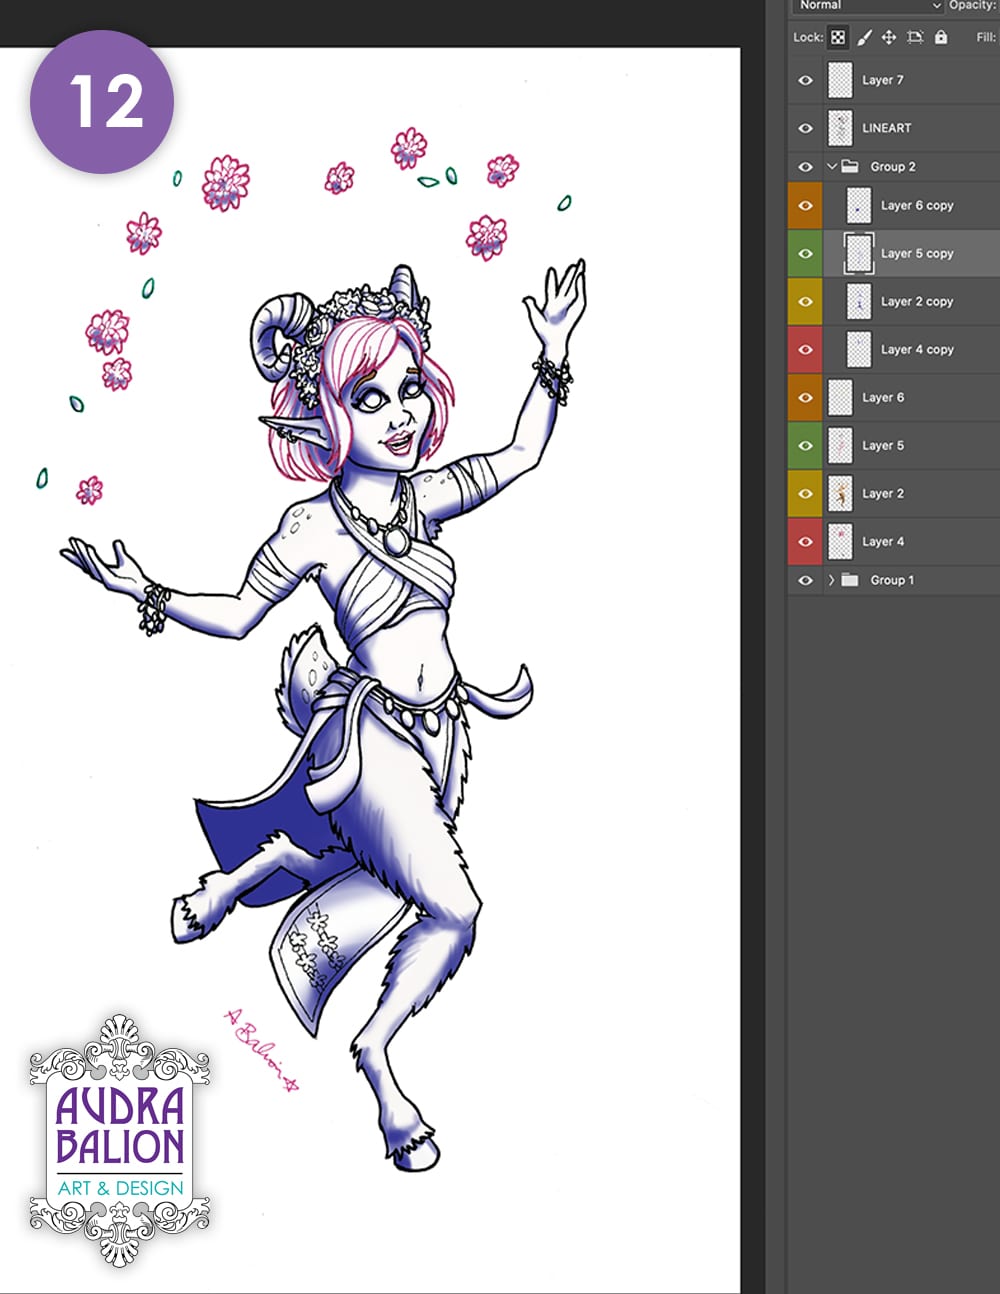
11. Shading
Using a soft brush, I colour in the shadows and highlights. Because using black and white can dull the palette, I use brown and purple for the shadows, and yellows for highlights. White is just for the super highlights, on the gem, eyes, and gold.
12. Base Shadows
This picture has special shadows as well, because she’s nyxborn, and they reflect the starry sky of Nyx. So we need some extra layers for shadows. To make these, I do this for each of the four layers: “Select All,” then nudge up & down once, which selects only the coloured portion of the layer. Then I make a new layer, and leaving the marquee active, colour in the shadows on that layer. This way, I’m not colouring outside the lines. (I also could have made a new layer and used a Clipping Mask to get rid of the extra mess, but I’ll be using Clipping Masks later for the starry effect, so I did it this way to avoid masks upon masks.)
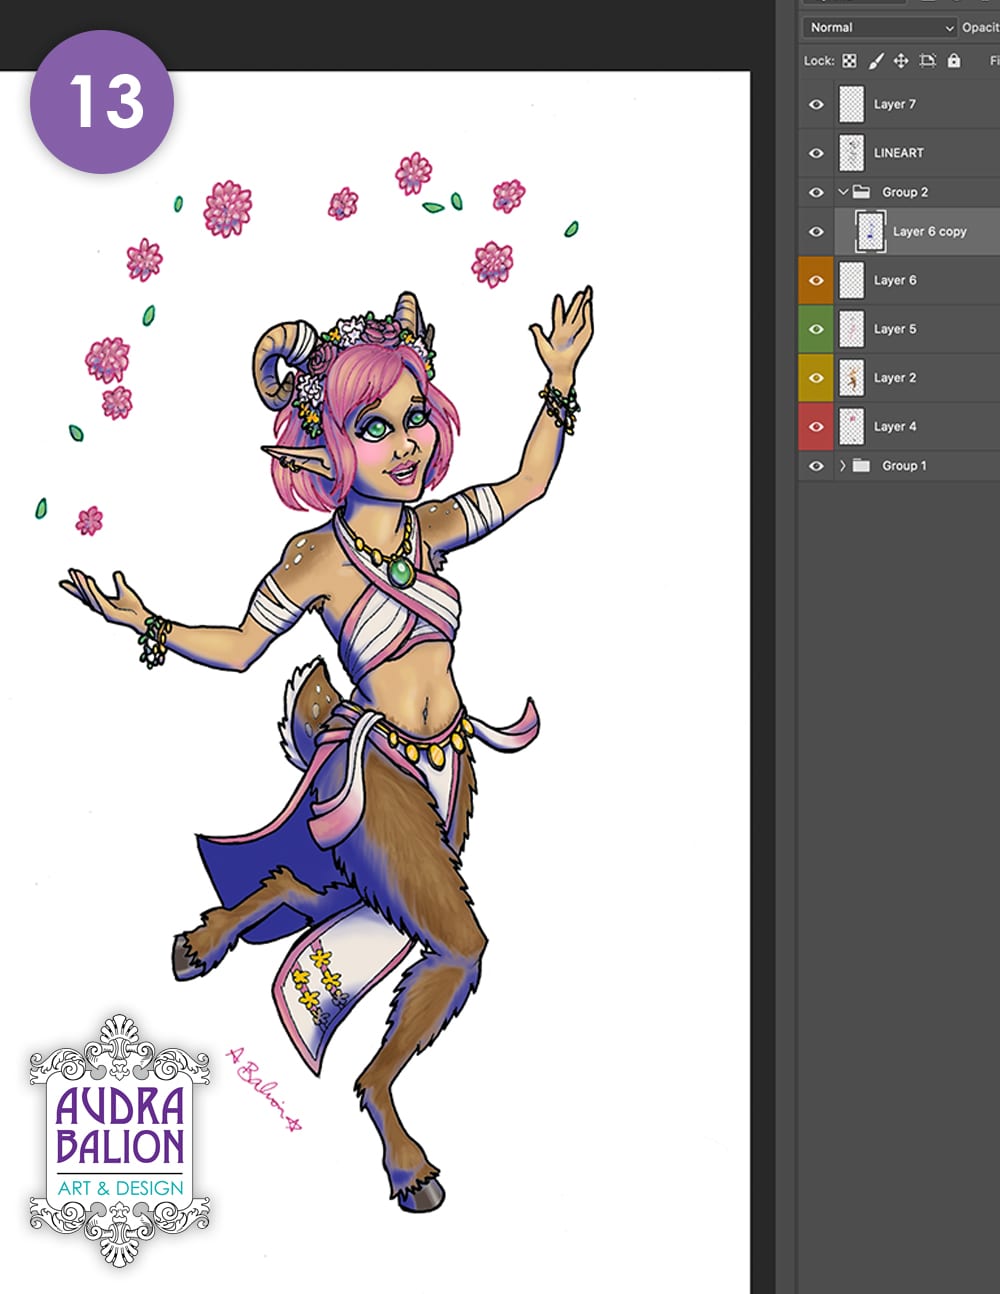
13. Merge Base Shadows
Merge all the shadow layers into one layer.
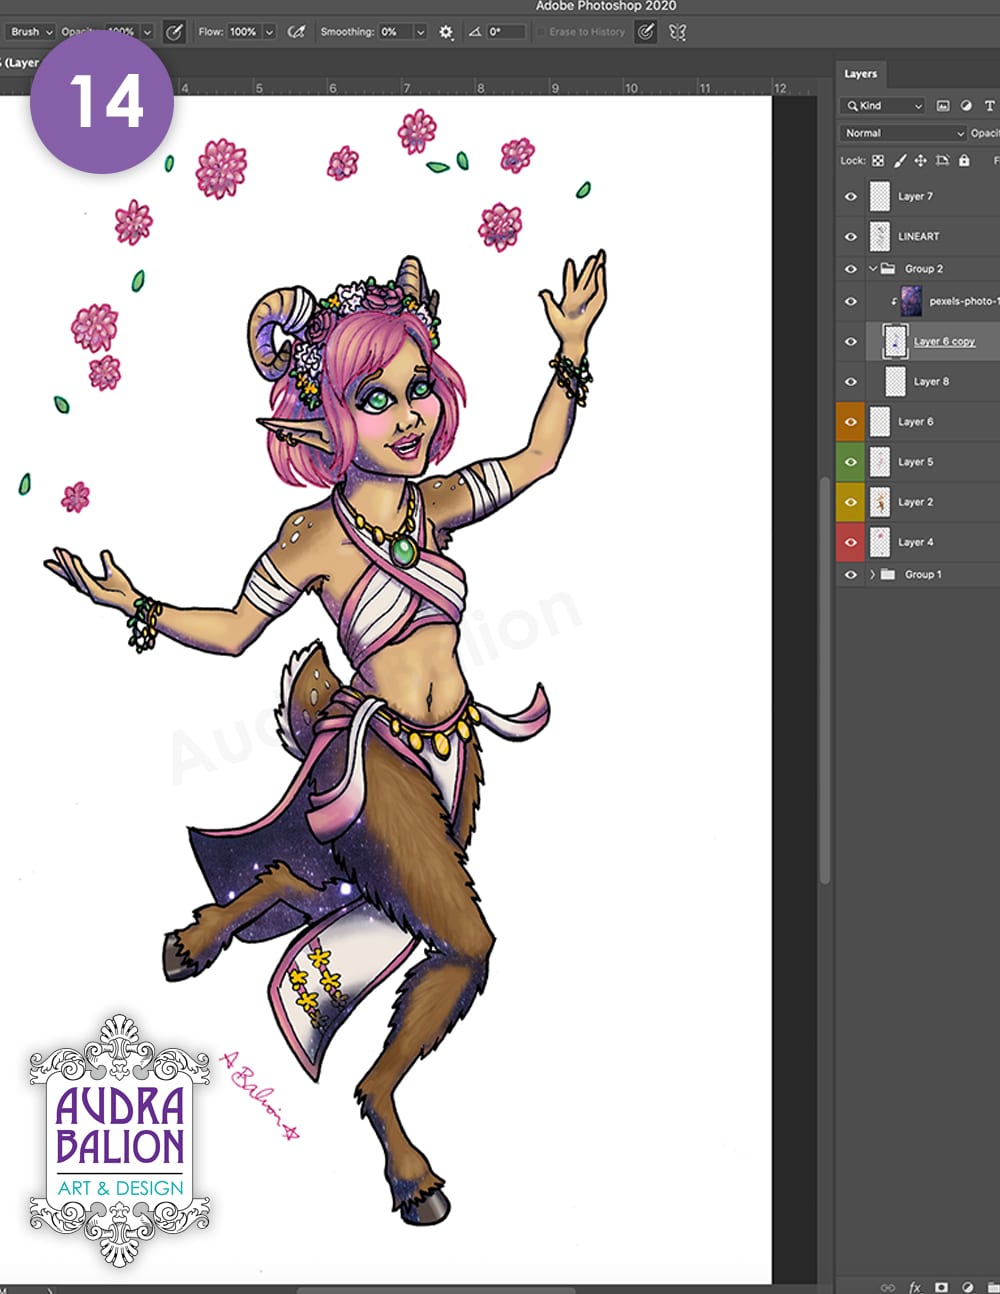
14. Galaxy Mask
I used a photo of a purply galaxy, but you can also paint one. Put this layer above the shadow layer, then right click it and select “Clipping Mask.” This makes it only show up within the confines of the layer beneath it.
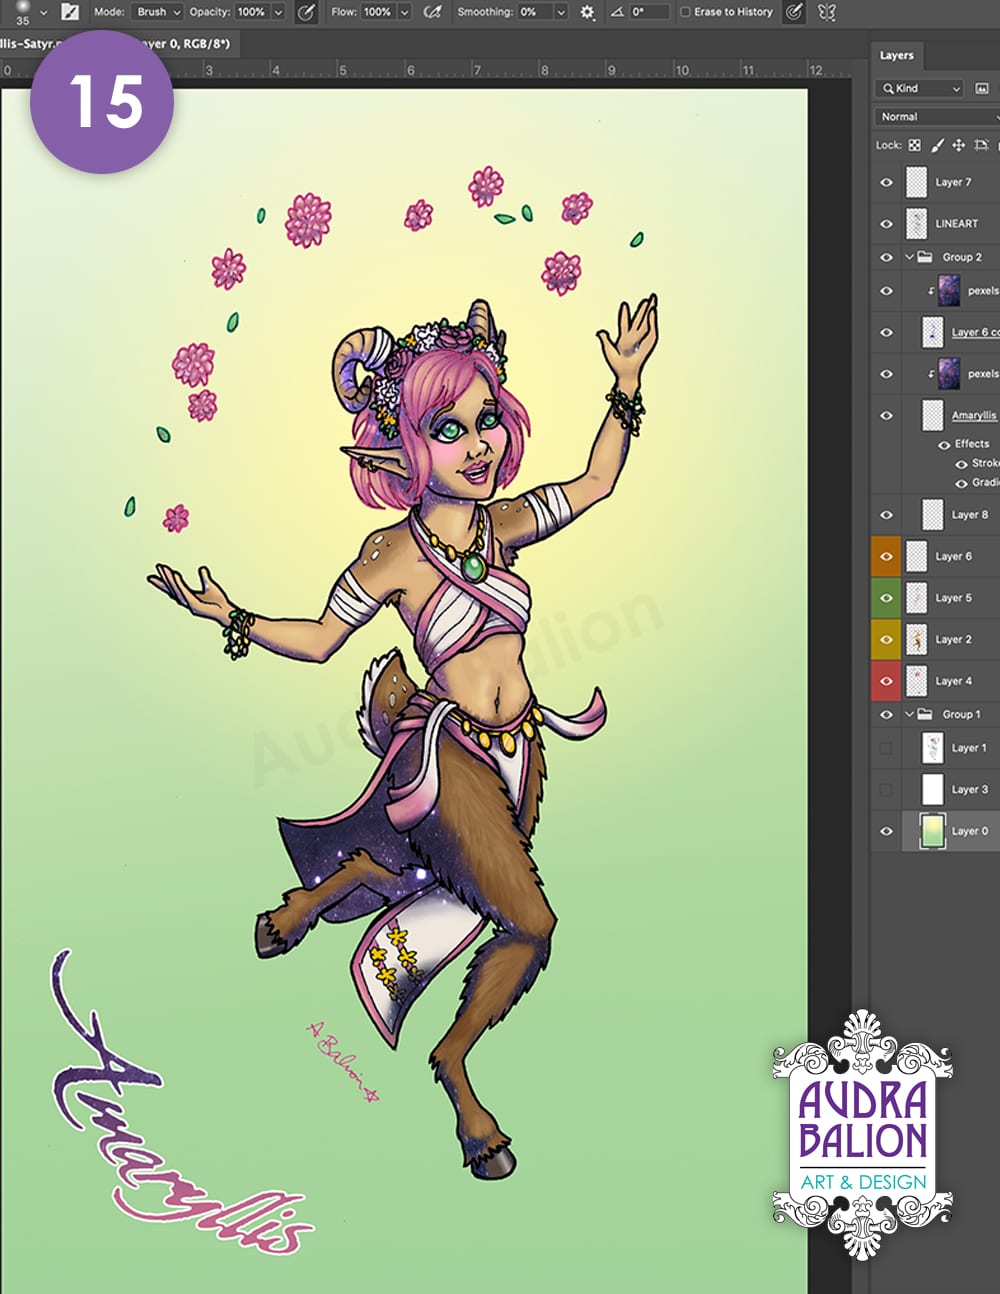
15. Background
To finish the picture, I added a simple background. I made a linear gradient top to bottom. Then a yellow to transparent radial gradient behind her head. And merge those layers. Then I added her name, Amaryllis, using the same galaxy clipping mask to match.
So that's it! I hope you enjoyed reading about my progress and process for this D&D character drawing. This was a whole lot of fun!
If you're interested in getting your character drawn up, be sure to check out my Commissions page.